
Turning Software Into Hardware: 8 Fun and Easy DIY Projects for Beginners

The world of technology is constantly evolving, and the lines between software and hardware are becoming increasingly blurred. It is now easier than ever to turn software ideas into tangible hardware creations, thanks to the availability of affordable microcontrollers and development boards. In this article, we will explore eight exciting DIY projects that demonstrate the power of transforming software into hardware. These projects are designed for beginners, with step-by-step instructions, detailed explanations, and helpful images to guide you along the way. With these hands-on projects, you will not only learn valuable skills but also create practical and innovative devices that can enhance your daily life and knowledge of electronics. Get ready to embark on an electrifying journey of turning software into tangible hardware creations!
4 out of 5
| Language | : | English |
| File size | : | 50977 KB |
| Text-to-Speech | : | Enabled |
| Screen Reader | : | Supported |
| Enhanced typesetting | : | Enabled |
| Print length | : | 345 pages |
1. Blinky LED: A Simple
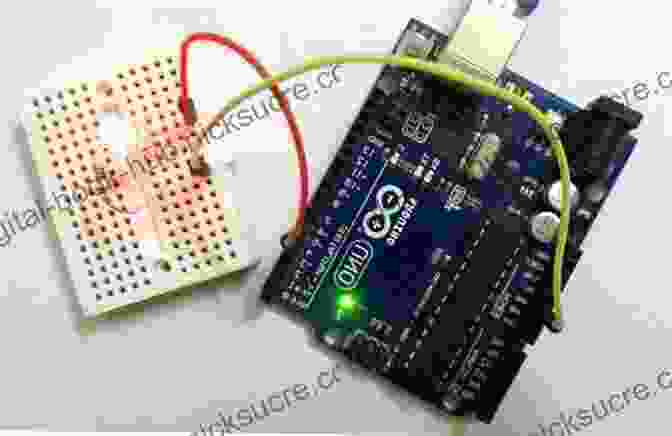
The Blinky LED project is a classic beginner's project that introduces the basic concepts of electronics and programming. In this project, you will learn how to connect an LED to a microcontroller and write a simple program to make it blink. This project is a great way to get started with hardware programming and learn the basics of digital electronics.
Materials:
- Arduino Uno microcontroller
- LED
- Resistor (220 ohms)
- Breadboard
- Jumper wires
Instructions:
- Connect the positive terminal of the LED to pin 13 of the Arduino Uno.
- Connect the negative terminal of the LED to ground (pin GND) through a 220-ohm resistor.
- Upload the following code to the Arduino Uno:
void setup(){pinMode(13, OUTPUT); }void loop(){digitalWrite(13, HIGH); delay(500); digitalWrite(13, LOW); delay(500); }Once you have uploaded the code, the LED will start blinking on and off every second.
2. RGB LED: Color Mixing and Control
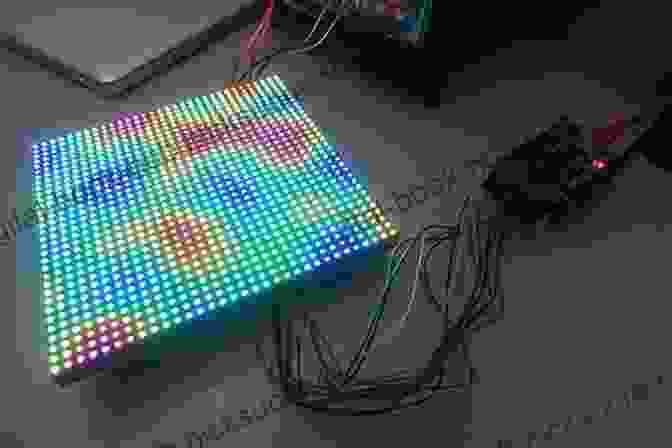
The RGB LED project takes the Blinky LED project to the next level by introducing the concept of color mixing. In this project, you will learn how to connect an RGB LED to a microcontroller and write a program to control its color and brightness. This project is a great way to learn about analog electronics and the basics of color theory.
Materials:
- Arduino Uno microcontroller
- RGB LED
- Resistors (3 x 220 ohms)
- Breadboard
- Jumper wires
Instructions:
- Connect the red terminal of the RGB LED to pin 13 of the Arduino Uno.
- Connect the green terminal of the RGB LED to pin 11 of the Arduino Uno.
- Connect the blue terminal of the RGB LED to pin 10 of the Arduino Uno.
- Connect all three cathodes of the RGB LED to ground (pin GND) through 220-ohm resistors.
- Upload the following code to the Arduino Uno:
int redPin = 13; int greenPin = 11; int bluePin = 10; void setup(){pinMode(redPin, OUTPUT); pinMode(greenPin, OUTPUT); pinMode(bluePin, OUTPUT); }void loop(){for (int i = 0; i 0; i--){analogWrite(redPin, i); analogWrite(greenPin, i); analogWrite(bluePin, i); delay(10); }}Once you have uploaded the code, the RGB LED will start fading in and out through all the colors of the rainbow.
3. Seven-Segment Display: Displaying Numbers and Characters
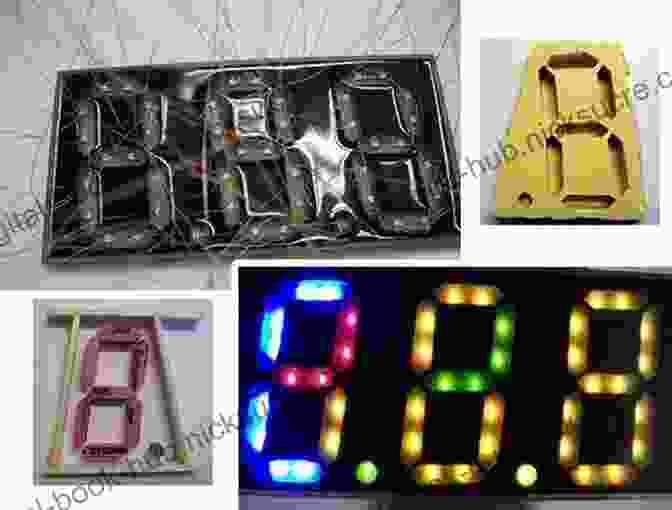
The Seven-Segment Display project introduces the concept of displaying numbers and characters on a hardware device. In this project, you will learn how to connect a seven-segment display to a microcontroller and write a program to display numbers and characters on it. This project is a great way to learn about digital electronics and the basics of interfacing with hardware devices.
Materials:
- Arduino Uno microcontroller
- Seven-segment display
- Resistors (8 x 220 ohms)
- Breadboard
- Jumper wires
Instructions:
- Connect the common cathode of the seven-segment
4 out of 5
| Language | : | English |
| File size | : | 50977 KB |
| Text-to-Speech | : | Enabled |
| Screen Reader | : | Supported |
| Enhanced typesetting | : | Enabled |
| Print length | : | 345 pages |
Do you want to contribute by writing guest posts on this blog?
Please contact us and send us a resume of previous articles that you have written.
 Best Book Source
 Ebook Universe
 Read Ebook Now
 Digital Book Hub
 Ebooks Online Stores
 Fiction
 Non Fiction
 Romance
 Mystery
 Thriller
 SciFi
SciFi Fantasy
 Horror
 Biography
 Selfhelp
 Business
 History
 Classics
 Poetry
 Childrens
 Young Adult
 Educational
 Cooking
 Travel
 Lifestyle
 Spirituality
 Health
 Fitness
 Technology
 Science
 Arts
Arts Crafts
 DIY
DIY Gardening
 Petcare
 Gregory T Haugan
 Joe Dieffenbacher
 Allum Bokhari
 William A Darity
 Blake Mycoskie
 Wolfram Siemann
 James O Keefe
 Malcolm Macpherson
 Brereton Greenhous
 Debra Satz
 William D Falloon
 Nikki Sixx
 Hans Urs Von Balthasar
 Kate Northrup
 Julia Elizabeth Sloan
 Saskia Vogel
 Richard Dorney
 Richard B Ross
 Joseph Heath
 John English
Light bulbAdvertise smarter! Our strategic ad space ensures maximum exposure. Reserve your spot today!


 Tennessee WilliamsJean Hugard's Magic Monthly Vol. 1, No. 1 (1944) Digital Reissue: A Legendary...
 Leon FosterThe Softer Side of Heavy Metal Town: Uncovering the Unexpected Charm Behind...


 Cruz SimmonsFollow ·9k
 Jerry HayesFollow ·6.9k
 Fredrick CoxFollow ·13.1k
 Jamie BellFollow ·16.9k
 Foster HayesFollow ·3.3k
 Casey BellFollow ·9.3k
 Caleb CarterFollow ·5.9k
 Eric HayesFollow ·19.7k

 Alfred Ross
Tough Cookies Don't Crumble: The Unbreakable Spirit of...
Life is full of challenges. We all...
 Jayden Cox
The California-Born Diners, Burger Joints, and Fast Food...
California is known for...

 Forrest Blair
 Reginald Cox
What's Hot in Blockchain and Crypto Volume
The blockchain and...

 E.M. Forster
The Ultimate Guide to Buying Liquidation Pallets from...
Buying liquidation...

 Rob Foster
What the Rich Invest In That the Poor and the Middle...
The Secrets of Building True...
4 out of 5
| Language | : | English |
| File size | : | 50977 KB |
| Text-to-Speech | : | Enabled |
| Screen Reader | : | Supported |
| Enhanced typesetting | : | Enabled |
| Print length | : | 345 pages |
